La Scienza in Cucina – Capire per Creare

Il corso nasce dalla mia conoscenza della materia chimica combinata alla passione per la cucina e si prefigge di stimolare la creatività in cucina attraverso una maggiore comprensione e un approccio sistematico alla materia culinaria.

È nato quando ho adottato una dieta a base vegetale e mi sono trovata a rivoluzionare il mio approccio, fino ad allora basato in gran parte su derivati animali.

Capire che olio scegliere per friggere, perché far riposare l’arrosto (o il seitan!), che amido scegliere per preparazioni diverse, perché è possibile spegnere il fuoco dopo aver buttato la pasta 😉, che ruolo hanno pomodori e funghi secchi in una preparazione, perché il pane diventa duro… Le risposte le troviamo nella conoscenza degli ingredienti.

Si parte da basi teoriche per addentrarsi via via nell’aspetto applicativo, fornendo conoscenze utili non solo a chi vuole occuparsi di cucina “senza”, ma a chiunque abbia interesse a capire meglio cosa succede nel tegame.

Il corso è online (piattaforma Zoom) ma non è pre-registrato. Io credo fortemente nell’interazione diretta, che apre allo scambio, alla discussione, al mutuo arricchirsi tramite domande e dubbi.

Tre lezioni teoriche di circa tre ore l’una:

– La struttura chimico-fisica dei macro-alimenti e delle fibre: non solo l’aspetto nutrizionale di proteine, grassi o carboidrati ma la loro struttura e, di conseguenza, le loro proprietà. Gli amino acidi, gli acidi grassi, gli zuccheri hanno strutture completamente diverse e dalla loro diversità derivano le proprietà delle molecole complesse che costituiscono il nostro cibo.

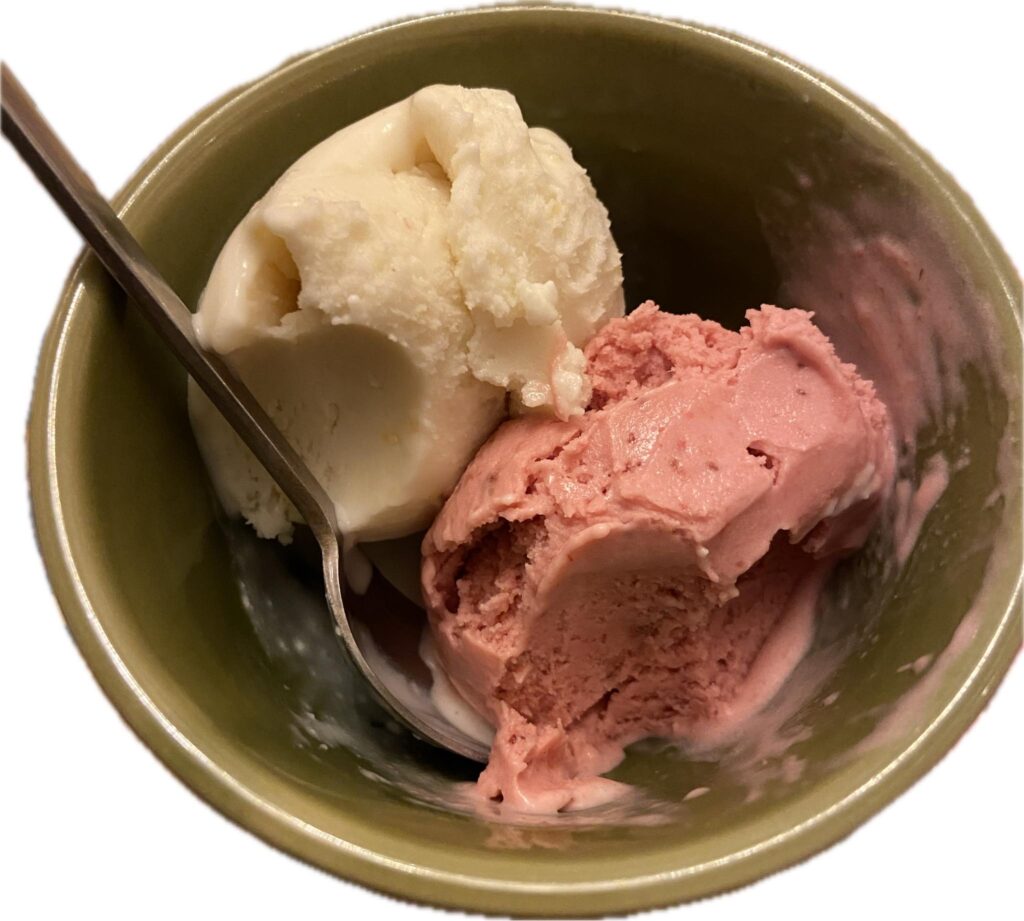
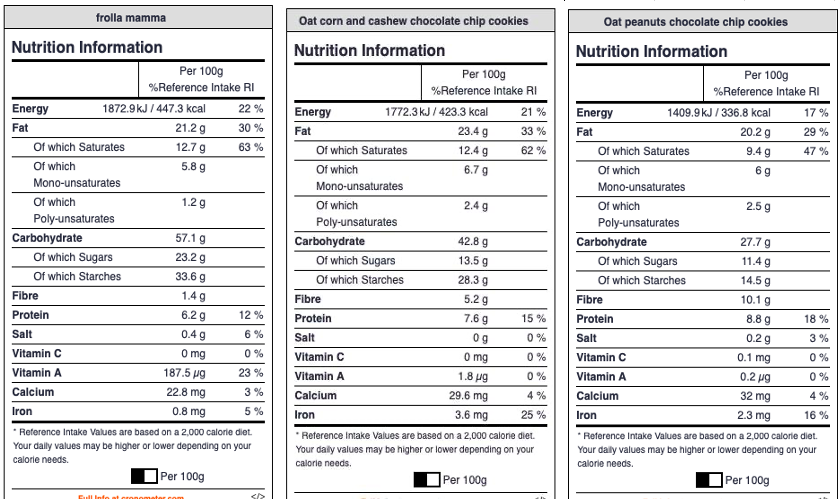
– Il comportamento dei macro-alimenti in campo alimentare e le loro proprietà organolettiche, caratteristiche la cui conoscenza ci permette di trasformare – per esempio – una maionese o una pasta frolla tradizionale nei loro equivalenti a base vegetale; la conoscenza più approfondita della struttura degli alimenti ci permette di capire come sostituire il burro in una preparazione vegetale, quale amido è più indicato per addensare una crema, e molto altro. Si comprenderà per esempio l’effetto dell’acido nella preparazione delle meringhe, come mantenere vivo il colore di un’erba aromatica, perché il bicarbonato è più utile dello zucchero nella preparazione della salsa del pomodoro, l’uso delle fibre oltre la nutrizione.

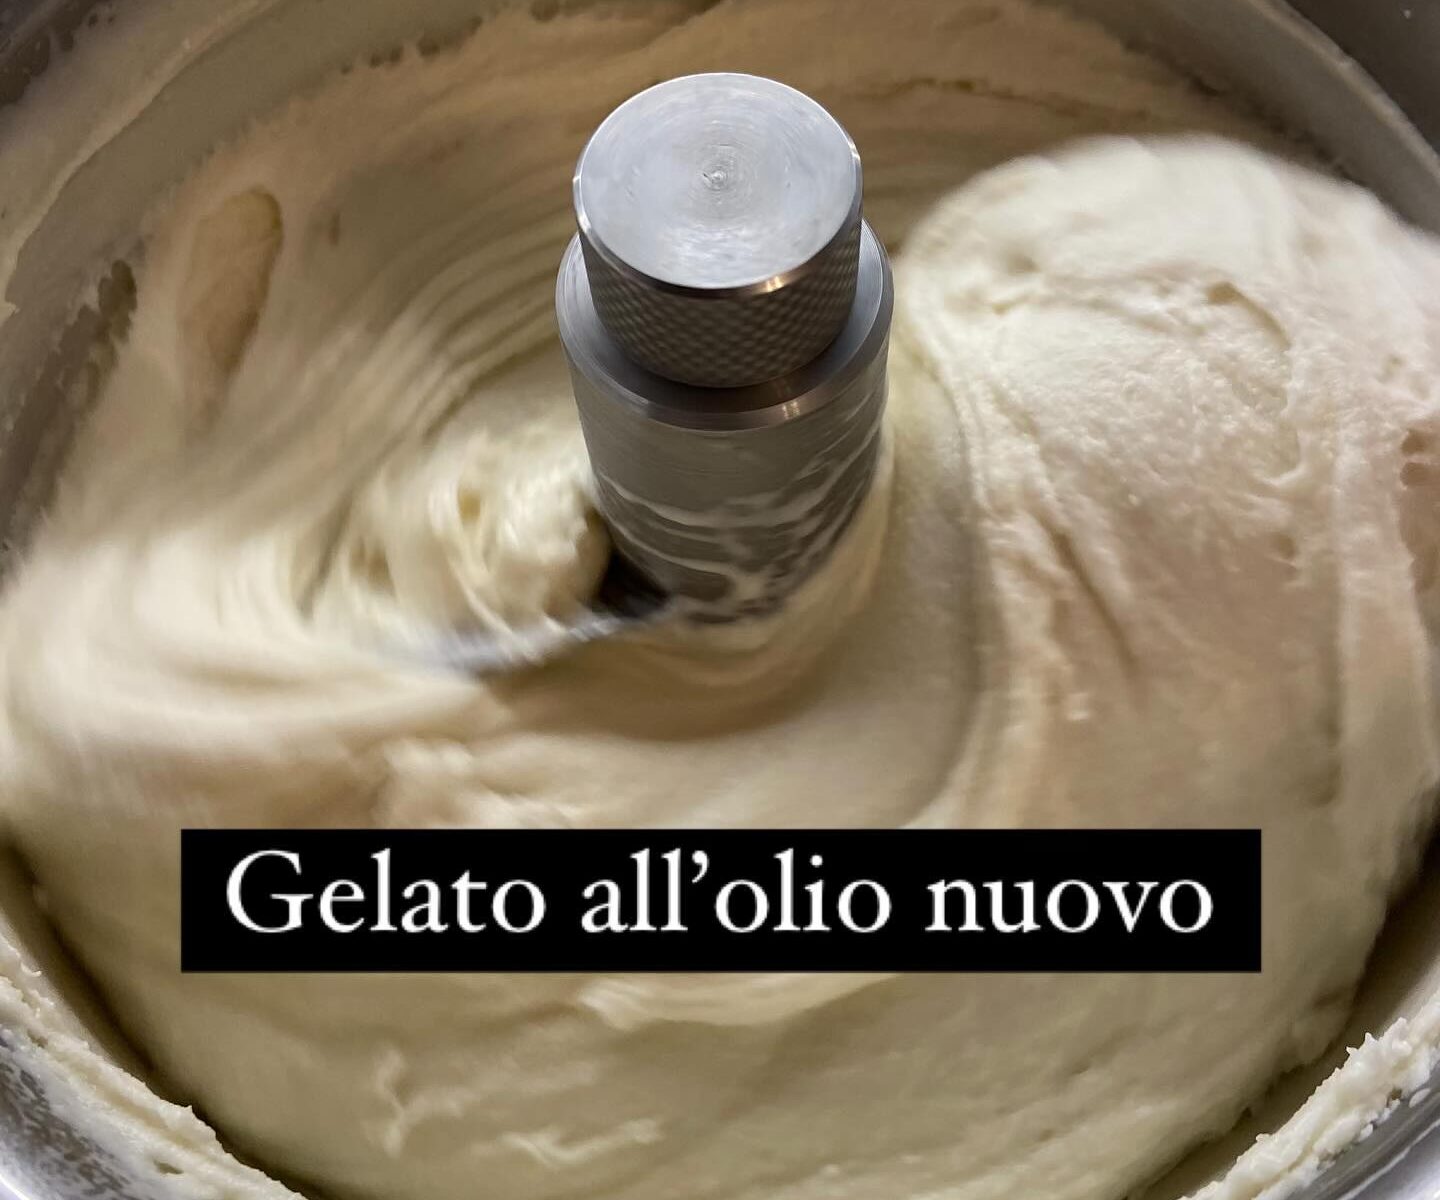
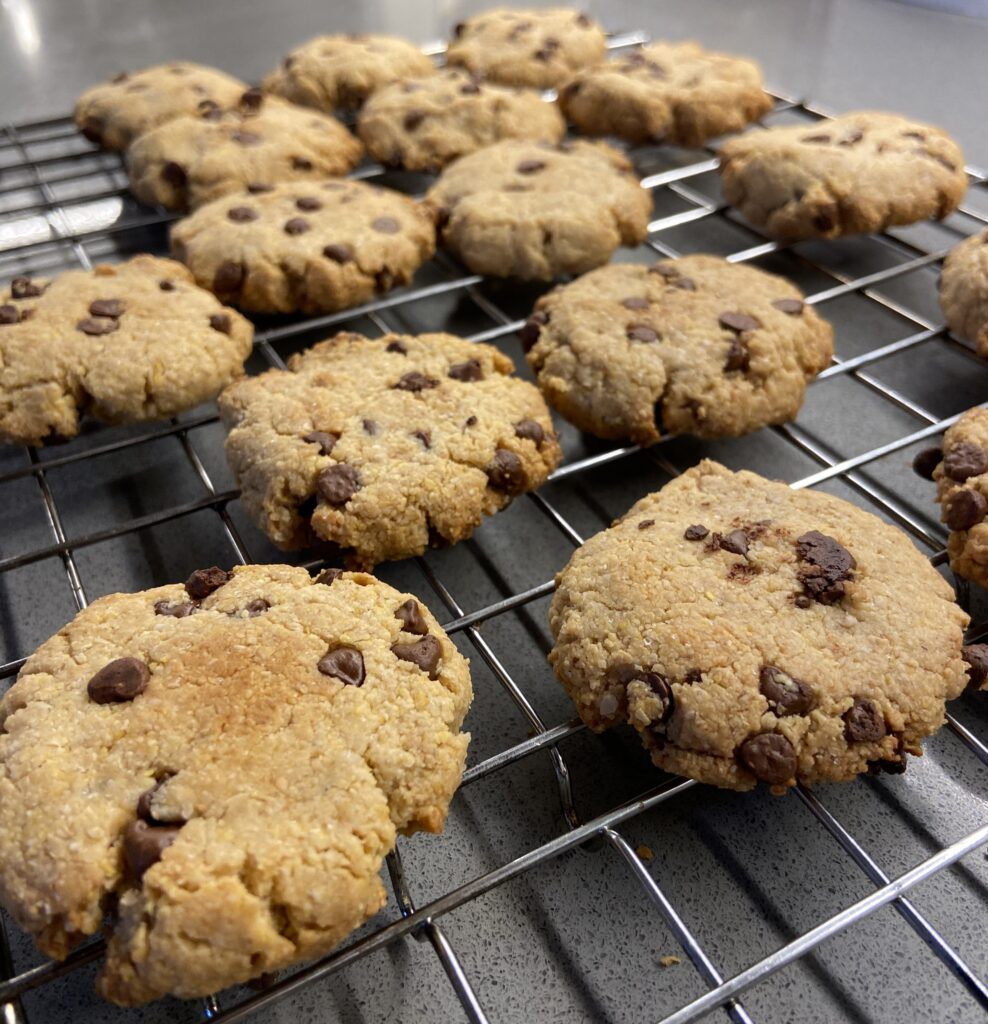
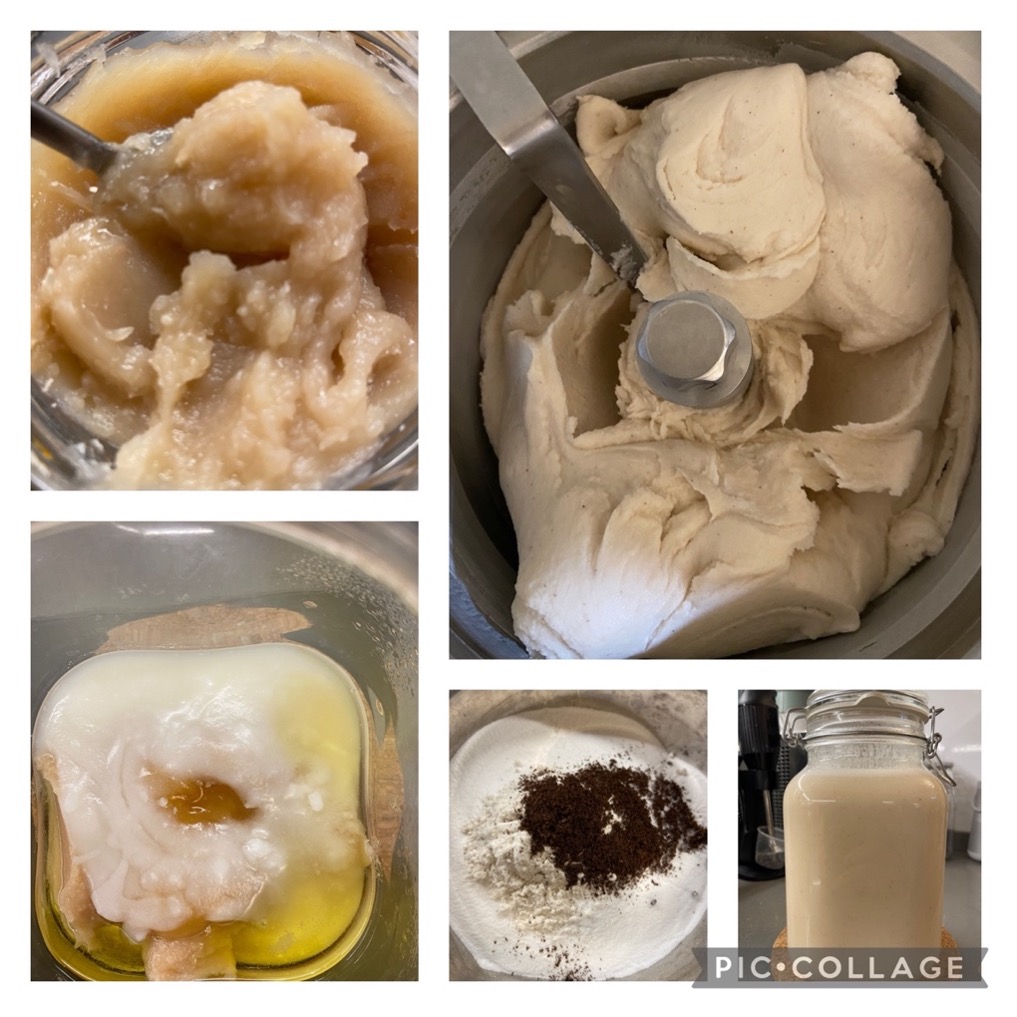
– Nell’ultima parte del corso si analizzano esempi concreti e pratici di preparazioni culinarie, oltre a come sostituire gli ingredienti di origine animale con ingredienti a base vegetale, mantenendo le caratteristiche organolettiche cui una tradizione culinaria a base di carne, uova e latticini ci ha abituato. Si comprende come può nascere un impasto senza glutine e come, invece, utilizzarlo per sostituire la carne. Vedremo inoltre come e perché preparare a casa alcuni ingredienti base della cucina a base vegetale.

Infine, i quattro gusti fondamentali ci permettono di creare piatti appetitosi ma la conoscenza del “quinto gusto”, la sapidità o umami, non è facilmente replicabile in preparazioni vegetali. La scomposizione di questo sapore nei suoi elementi fondamentali ci permette di “ricostruirlo” e quindi di replicare, anche se non completamente, questo componente organolettico fondamentale.

Parleremo anche di oleogustus, e del suo importante ruolo evolutivo.

Il corso è di ovvio interesse per chi sta meditando una transizione ad una dieta a base vegetale, ma ogni cuoco sarà stimolato nella propria creatività a soddisfare qualunque esigenza.

Le spiegazioni sono tecniche e dettagliate ma non richiedono una conoscenza precedente della scienza chimica, per permettere a tutti di fruire del corso (e potete interrompermi in ogni momento se qualcosa non è chiaro!).

Contattatemi per le prossime date!

Costo: 150 Eur pagabile tramite bonifico per le date fisse. È possibile organizzare il corso in orari diversi ad un costo leggermente superiore (180 Eur)

Per iscrizioni e maggiori informazioni, contattatemi per email (thecraftsycat@gmail.com)

Oleogels in ice cream

The other day I was reading a paper about the use of oleogels in ice cream. Essentially, some molecules can be mixed with low-temperature-freezing fats to make them thicker and therefore more suitable for ice cream, where fat crystals play a very important role in the stabilisation of air. If the fat remains liquid at low temperatures, its network collapses and becomes way less efficient in keep the ice cream structure up. All stuff that I explain in great detail in my ‘Introduction to (vegan) ice cream’ course, in case you are interested :-).

The article mentioned beeswax as one of the possible ‘gelators’ – I know we are out of the vegan ice cream realm, but I happen to have a beehive and collect some honey when the bees make a lot and keep the opercles (the cell lids). Over the years, I collected a block of wax in the cupboard that I have used to make hand cream and candles.

A vegan alternative can be carnauba wax which is sourced from plants. I will definitely try it next. There is some literature already published.

To prepare the oleogel, I heated some olive oil in a bain marie and fully dissolved beeswax in it, stirring well. The oily mixture contained 7% beeswax. I left the mix cool down to a lip balm texture and then used in in place of the coconut oil in my standard white base (for example, the one I published recently). I used refined olive oil to avoid covering any off-flavours but this method opens up the option to use different cultivars of extra-virgin olive oil.

The mix looked very nice and smooth, it cooled to a viscous cream – as I was expecting, and it churned beautifully. And what is important, it has a really nice flavour.

It also melts well, homogeneously so it really looks nice and promising for more experiments.

I am very pleased with the results so far. Now I can use local oil for a variety of interestingly flavoured ice creams, feel a bit less guilty about deforestation and of course have an answer for those people arguing that coconut oil and saturated fats are bad for me. Hooray!

A generic white base

I designed this recipe for some US friends, who liked this. It is a bit different from my usual recipes as it has a lower freezing point – this should make it relatively well scoopable out of a normal freezer. You can infuse with herbs or spices – I used vanilla paste here.

The recipes are somewhat in between an ice cream and a gelato – strictly speaking they are too high in total solids and fats to be considered a gelato and too high in sugars to be considered an ice cream. But hey! let’s not get jammed by rules if we know what we are doing and especially if we are making ice cream for home and friends.

I was not sure how to consider corn syrup in terms of sucrose equivalence – I calculated the recipe once considering that corn syrup would be similar to glucose syrup 40DE and once considering it as glucose syrup 60DE. In both cases the calculations give me acceptable results with a freezing point in the -2.5 to -2.9 °C range depending on the Dextrose Equivalence I considered.

If you test the recipes, let me know what you think!

Ingredientgrams%grams%
Soy Milk5735700
Oat milk (Silk Extra Creamy)0059359
Sugar1561615015
Corn Syrup1001010410
Refined coconut oil899929,2
Cashew butter or blend in566586
Stabiliser1,70,21,70,2
Rolled oats56200
Vanilla paste or other spices20,220,2
Total for soy milk recipe1000100
Total for oat milk recipe1000100
The first two columns refer to the soy milk recipe. The last two column refer to the oat milk recipe

In the soy milk recipe, some rolled oats are first soaked in the hot milk and then blended in to increase chewiness – they are optional – if using make sure they are blunted well or results could be a bit gritty.

Use your stabiliser of choice, I like a mix of tara and xanthan in 9:1 ratio lately, which I disperse in the sugar to avoid lumps when adding to the recipe.

If you have a powerful blender, you can blend everything together. I prefer to use cashew butter to make sure results are smooth, gently warm (to about 45 °C) the plant-based milk with the solids (sugars, stabilisers, spices, and the glucose syrup), add the cashew butter and the coconut oil. Strain if necessary then cool rapidly and refrigerate for a few hours before churning.

If you test the recipes, let me know what you think!

Cookies

oats and peanut chocolate chip cookies

My mum’s shortcrust was very rich – 300 grams of flour, 3 egg yolks, 150 grams of butter, 150 grams of sugar and a pinch of salt. I loved it but it was way too sweet. I have been working towards a plant-based shortcrust which can give similar results, but be less sweet and I have developed several recipes which I use for pies or for cookies.

When I calculated the nutritional breakdown for my mum’s shortcrust, it comes at about

33% starch, 23% sugar, 21% fats and 6% protein

Typically, I try to shift the carbohydrate portion away from starches and sugars and towards fibers – keeping fats and proteins as close as possible as in the original recipe. So here are two possible approaches which I found pretty good. I also like to use nut flours as they create a nice texture. I normally take the nuts, sometimes roast them slightly sometimes not, and grind them into a flour.

In the recipe for the chocolate chip cookies in the first picture, I used cashews, oat and corn flours (the corn gives a nice yellow colour as I do not like to use turmeric in sweets – it tastes bitter), coconut oil and sugar, worked together all solids and then added some liquids to hold the dough together. After a little rest, I formed 16 cookies which I cooked for 15′ at 180°C.

125g oat flour

75g corn flour

50g toasted cashew flour

50g coconut oil

50g table sugar

50g dark chocolate chips

50g water

25g unsweetenedsoy milk

In the recipe for the ones in the second picture, I used the same procedure but this is the list of ingredients for 18 cookies. The increased fiber load required more liquid:

150g oat flour

50g oat fiber

100g toasted and salted peanut flour

55g table sugar

47g coconut oil

50g dark chocolate chips

150 g unsweetened soy milk

In both cases I have similar macros for fats and proteins, less sweetness and more fibers – I went really heavy on fibers with the second recipe. I loved both, so did Russ. My point is that when we understand a recipe, we can create others that follow the initial guidelines but tailoring according to our personal preferences. These are just to of the many variations I made, often with a ’empty the pantry’ goal 🙂

Introduzione alla Scienza del Gelato

Sei appassionato di gelato ma non riesci a trovare in rete ricette a base vegetale affidabili? Hai un ristorante e vuoi proporre gelati particolari ma non sai da dove cominciare? Posso aiutarti a sviluppare ricette personalizzate – sia a base vegetale che ‘tradizionali’.

Se sei interessata/o a capire come si ‘costruisce’ un gelato, a diventare autonoma/o nel costruire una nuova ricetta, il mio corso su zoom (in sincrono, non pre-registrato), casca a fagiolo 😉

Il corso è utile a tutti, indipendentemente dal fatto che seguano una dieta a base esclusivamente vegetale, perché è solo dalla comprensione di cosa succede che possiamo creare cose nuove! Inoltre oggi sempre più persone preferiscono non utilizzare latticini e le alternative non sempre sono disponibili, o sono estremamente dolci. Imparare a creare il proprio gelato conoscendone i principii ci permette di disegnarlo esattamente come vogliamo noi.

E proprio perché meno facile, sono convinta che comprendere il gelato a base vegetale permetta di padroneggiare il gelato tradizionale ad occhi chiusi o quasi.

Nel corso tratteremo diversi argomenti; dalle caratteristiche chimico-fisiche dei componenti del gelato, alla loro funzione nel gelato, a come sostituire gli elementi ‘classici’ (latte, panna, uova); vedremo come analizzare una ricetta trovata in rete e come eventualmente modificarla e ovviamente capiremo l’importanza di ognuna delle fasi di preparazione, perché il come – nel gelato ma non solo – è importante quanto il cosa. Nel dettaglio tratteremo:

  • La struttura chimico-fisica dei macro-alimenti e delle fibre: non solo l’aspetto nutrizionale di proteine, grassi o carboidrati ma la loro struttura e, di conseguenza, le loro proprietà. Gli amino acidi, gli acidi grassi, gli zuccheri hanno strutture completamente diverse e dalla loro diversità derivano le proprietà delle molecole complesse che costituiscono il nostro cibo.
  • Il comportamento dei macro-alimenti nel gelato ci aiuta a selezionare il tipo di grasso giusto per ottenere la cremosità desiderata, a comprendere e scegliere il contributo delle proteine, e selezionare quali e quanti zuccheri utilizzare (o anche i non-zuccheri)
  • Il gelato a base vegetale presenta ancora una sfida, perché gli ingredienti che si utilizzano hanno un comportamento che non riflette a pieno quello degli ingredienti tradizionali. Per questo motivo è importante capire similitudini e differenze, e imparare a scegliere quello che si avvicina maggiormente alla nostra idea di gelato. Sì, perché il gelato non è un concetto unico, eterno e non modificabile… il gelato è cultura e apertura al nuovo, come la cucina in generale!
  • Come preparare gli ingredienti, come preparare una miscela, perché e come farla ‘maturare’ e come sapere se il gelato è pronto.

Il corso è organizzato in 4 incontri di circa un’ora (ma possono essere anche due da due ore o una full immersion!) e un quinto incontro personalizzato che svolgiamo ad almeno una settimana di distanza, per permettervi di riguardare il materiale, farvi venire mille dubbi e lasciare a me il tempo di pensare alle richieste che mi farete eventualmente (per esempio approfondire il gelato senza zucchero, o sviluppare un paio di ricette e discuterle, insomma quello che vi pare più utile).

Gli argomenti sono tecnici e scientifici ma – spero! – resi accessibili a tutti, almeno questo è il feedback ricevuto fino ad ora. Cerco di spiegare il ‘perché’ e non solo il ‘come’ si fa.

Costo: 150 Eur tramite bonifico bancario o PayPal (+7% commissioni). La fattura è detraibile se applicabile.

Per iscrizioni e maggiori informazioni, contattatemi per email (thecraftsycat@gmail.com)

Sono disposizione anche per consulenze su argomenti specifici.

Science in the Kitchen – Understanding allows us to create

The course stems from my knowledge of chemistry combined with a passion for cooking and aims to stimulate creativity in the kitchen through greater understanding and a systematic approach to culinary matters.

The idea for the course came when I adopted a plant-based diet and found myself revolutionizing my cooking approach, until then based largely on animal derivatives.

Understanding which oil is best for frying; why we need to let a roast (or seitan!) rest; which starch to choose for different preparations; why it is possible to turn the hob off to cook pasta; what role tomatoes and dried mushrooms play in a preparation, why bread becomes stale … The answers are found in the knowledge of the ingredients.😉

The course starts from theoretical bases and moves into the practical aspect, providing useful knowledge not only to those who want to deal with “free-from” cooking, but to anyone interested in a better understanding of what happens when cooking.

The course is online (Zoom platform) but is run synchronously, not pre-registered. I strongly believe in direct interaction, which allows for exchange, discussion, mutual enrichment through questions and doubts.

Three lessons (about three hours each):

– The chemical-physical structure of macro-foods and fibers: not only the nutritional aspect of proteins, fats, and carbohydrates but structure and properties. Amino acids, fatty acids, sugars have completely different structures and it is from their diversity that the properties of the complex molecules that make up our food stem.

– The cooking behavior of macro-foods and their organoleptic properties: knowing their characteristics allows us to transform – for example – a mayonnaise or a traditional short crust pastry into their plant-based equivalents; a deeper knowledge of the structure of foods allows us to understand how to replace butter in a plant-based preparation, which starch is best suited to thicken a cream, and much more. You will understand the effect of acid in the preparation of meringues, how to keep the color of an aromatic herb alive, why baking soda is more useful than sugar in the preparation of tomato sauce, the use of fibers beyond nutritional aspects.

– In the last part of the course we go through concrete and practical examples of culinary preparations, as well as seeing how to replace ingredients of animal origin with plant-based ones yet maintaining the organoleptic experience to which a culinary tradition based on meat, eggs and dairy products has accustomed us. We will understand how a gluten-free dough can be prepared and how, instead, gluten can be used it to replace meat. We will also see how to and prepare some basic ingredients of plant-based cuisine and why it can be a good idea to take the time to do that.

Finally, we know how the four basic tastes allow us to create appetizing dishes but the knowledge of the “fifth taste”, the flavor or umami, is not easily replicable in plant-based preparations. The breakdown of this flavor into its fundamental elements allows us to “reconstruct” it and therefore to replicate, even if not completely, this fundamental organoleptic component.

We will also talk about oleogustus, and its important evolutionary role.

The course is of obvious interest to those who are thinking about transitioning to a plant-based diet, but any cook will be stimulated in their creativity and become more confident in being able to meet any need.

Explanations are technical and detailed but do not require prior knowledge of chemical science, so everyone should be able to enjoy the course (also, you can interrupt me any time if something is not clear!).

Due to time zone differences, it is difficult to set fixed dates/times so the course will be generally run on a one-to-one basis at a cost of 180 Eur/195 USD. If a group of 2+ people is formed, the cost is 150 Eur /165 USD per person. I issue a regular tax-deductible (if applicable) invoice.

Carrot and Coriander

A friend asked me to make this flavour after watching a TV program where the presenter made this gelato on a trip to Italy. It’s an unusual flavour – I love it in soups, we make it regularly during Winter, but I did not think of it in a sweet version.

Anyway, here it is. I cooked the carrots in the recipe coconut oil – I used a ‘microwave pressure cooking’ method using Weck jars secured with 4 clips. In order to use this method, you first need to find the correct power to use in your microwave – you will need to select the power at which water boils in about 3′ (https://ask.usda.gov/s/article/how-do-you-determine-the-wattage-of-your-microwave-oven). If you are not familiar with this method, please use your favourite cooking method.

The recipe is water-based, and I used cashews to increase solids and fats.

Ingredient%
Water56
Carrots (raw weight)11
Sucrose10
Cashew butter7
Coconut oil6
Dextrose5
Vegetable fibers (inulin for example)4%
Stabilisers of your choice – I generally use a mix of tara/guar and xanthan gums at 3g/Kg of mix

I weighed all the solids (sugars, fibers and stabilisers), mixed them, added warm water (ca 50°C, blended well, and finally the cashew butter and the oil-cooked carrots. I blended well, then left the mix to rest in the fridge overnight before churning.

I used ca 1g of ground coriander seeds per Kg of mix – this amount will depend on the quality and age of the coriander you use, so the amount is just an indication. Keep in mind that its flavour will continue to develop and that it will not be muted by the cold temperature.

I apologise for the poor picture quality – but the gelato was beautiful!

Note – my ice creams are designed to be consumed immediately or kept in a somewhat warmer freezer (-10°C). If you wish to store them at the normal -18°C freezer temperature, they will become harder than usual (most ice creams will go hard in a deep freezer, it’s normal, nothing wrong with it!). To limit this inconvenience, you can bring the percentage of sugars (sucrose and dextrose) up to a total of approximately 22% keeping the same sucrose/dextrose ratio and decrease the liquid or the fibers to keep the same mixture total weight.

I won!

the preparation stages

I am so very very happy! I participated to a contest called The Green Cream which was calling for proposals related to sustainability in ice cream making. There were four different categories and I submitted a recipe.

I decided to take part with a bean based recipe. I selected a local white bean (‘Fagiola di Venanzio‘) which is extremely local and has been declared endangered by the Tuscany region. But for all of you out there, you can use cannellini beans with very similar results.

So, without further ado, the recipe. It is composed of two parts: a bean jam (what the Japanese call anko, which is a bit long to prepare but can be stored for weeks in sterilised jars once made, and I recommend making a discrete amount, given the effort. And the the gelato itself, which uses about 20% of this bean jam in the base. The base is fairly neutral, and can be flavoured as desired. For example with vanilla, or saffron, or mix spices, or lavender. I made all these variations myself.

For the anko you really overcook (I use a pressure cooker) the beans and after cooking you blend them thoroughly with their cooking water. I prefer not to strain the skins but this is always an option if you desire a smoother texture. Then, you add as much sugar as the initial dry beans weight and keep cooking, always stirring (careful not to get burnt as is splatters a lot and it’s HOT!) until the mixture takes a jam consistency. If you ‘cut’ it with a wooden spoons it takes a little for the two parts to join again. Make sure you take the final weight of the jam, as you will use it to calcolate the nutrient percentages. But after repeating the preparation a few times, I calculated that on average the table is ca. 28-30% sugars, 0,8-1% fats, 7,4-7,8% proteins, 11-12% starches e 4,5-5% fibres. Pour hot into sterilised jars, close and sterilise again and you are all set.

For the ice cream, this is a standard recipe. It will turn hard in a normal freezer at -18°C so you can add more sugar as explained in the note at the bottom of the page. Weigh (quantities in grams) and blend really well together all the ingredients:

536      water (ca 54%)

200      anko (ca 20%)

70        honey (select the flavour depending on the character you want to give to the gelato) or agave syrup (ca 7%)

67        deodorised coconut oit (ca 6,5%)

65        sucrose (ca. 7%)

28        olive oil (ca 2,5%) (select extravergin if you want it to impart a strong character)

20        inulin (ca. 2%)

10        acacia fiber (ca. 1%)

3          stabiliser (I use a tara/guar/xanthan mix with a 90/5/5 ratio) (ca 0,3%)

Cool the mix, let it rest in the fridge for a few hours then churn.

For flavour, you can add some vanilla (0,5-1g of vanilla paste/Kg) or saffron (0,2-0,3g/Kg) or whatever you fancy. Enjoy!

Note – my ice creams are designed to be consumed immediately or kept in a somewhat warmer freezer (-10°C). If you wish to store them at the normal -18°C freezer temperature, they will become harder than usual (most ice creams will go hard in a deep freezer, it’s normal, nothing wrong with it!). To limit this inconvenience, you can bring the percentage of sugars (sucrose and dextrose) up to a total of approximately 22% keeping the same sucrose/dextrose ratio and decrease the liquid or the fibers to keep the same mixture total weight.

Liquorice!!!

Isn’t liquorice great? If you love it, that is. Other people positively hate it. For those who love it, vegan or not, this is a lovely gelato, and easy to make.

Ingredients (grams)

water44259%
cashew butter11215%
sucrose8011%
dextrose405%
inulin304%
coconut/olive oil 7/3203%
pure black liquorice193%
stabiliser (e.g. locust bean gum/xanthan 95/5)2.50,3%

Mix the sugars, inulin, powdered liquorice and stabiliser and add them to the water at ca 40°C, mixing well. Bring to ca 85°C always mixing. remove from heat, add the cashew butter and the oils, blend thoroughly . Cool rapidly. Let the mixture rest for a few hours, then churn.

Note – my ice creams are designed to be consumed immediately or kept in a somewhat warmer freezer (-10°C). If you wish to store them at the normal -18°C freezer temperature, they will become harder than usual (most ice creams will go hard in a deep freezer, it’s normal, nothing wrong with it!). To limit this inconvenience, you can bring the percentage of sugars (sucrose and dextrose) up to a total of approximately 22% keeping the same sucrose/dextrose ratio and decrease the liquid or the fibers to keep the same mixture total weight.

Roasted banana ice cream

For this delicious roasted banana ice cream I cooked 600g of overripe fruit with 45g of dark demerara sugar, then completed the recipe with cashew butter, some oils and water to give a very thick mixture which I churned.

The calculations are based on the dry banana matter (bananas contain ca 75% water) and on the assumption that the sugars in bananas are a 1:1:1 mix of sucrose-fructose-dextrose, which is of course an assumption as it will depend a lot on the ripeness stage and on the cooking process.

As usual if you make it for a normal freezer you can add a little more sugar (in this case I am not sure I would remove the corresponding water, due to the thickness of the mixture).

water50063%
cashews608%
cooked banana (dry weight)15019%
sucrose (dark demerara)456%
coconut/olive oil 7/3405%
salt20,2%
fsc/xanthan 9/13,00,4%

Note – my ice creams are designed to be consumed immediately or kept in a somewhat warmer freezer (-10°C). If you wish to store them at the normal -18°C freezer temperature, they will become harder than usual (most ice creams will go hard in a deep freezer, it’s normal, nothing wrong with it!). To limit this inconvenience, you can bring the percentage of sugars (sucrose and dextrose) up to a total of approximately 22% keeping the same sucrose/dextrose ratio and decrease the liquid or the fibers to keep the same mixture total weight.